
DYMO has focused their efforts to simplify patch panel labeling. The patch panel can be the most difficult of all the copper connectivity components to label. As the density increases, the labeling field decreases, so in the field, labeling becomes more difficult. This article, written by DYMO's resident RCDD, Al Feaster, will show you how DYMO makes labeling easier.
Standards around the copper patch panel
- Patch panel length and width are controlled by standards
- The 8-pin modular jacks must also meet manufacturer standards
Manufacturer flexibility
As long as they fall within the standards mentioned above, each manufacturer can arrange, space, or group the jacks on a patch panel to meet electrical requirements.
Labeling exercise
I want to take you through the steps to quickly and easily label a patch panel. I am going to use the DYMO ID software to illustrate the steps.
Step #1 Determine the total number of ports on the patch panel.
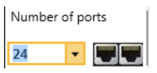
You can select from the menu or type in the number.
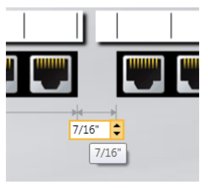
Step # 2 Select the center of jack to jack spacing.
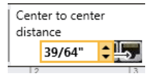 You can select from a drop down menu or enter the number yourself.
Step # 3 Select the jack grouping.
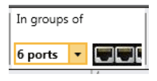 Select from the menu or insert the number. These are normally 4, 6, or 8.
Step # 4 Determine the label set up. Do you want one label per group or one label for all groups?
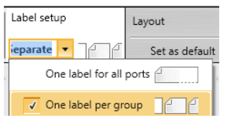 If you select one label for all groups you will need to set the group clearance.
 You can change the distance from the drop-down menu or enter the required distance.
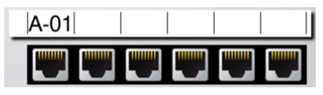
With the set up done, we now can enter the first identifier for the patch panel label.
 We can go to the next jack and enter A-02, A-03, A-04 or we can serialize to save time. First we select the first jack then go to the top bar to Serialize.
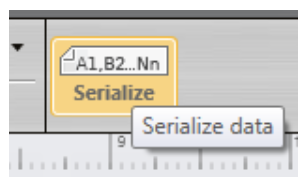 Once Serialize is selected the screen below allows you to select what you want to serialize.
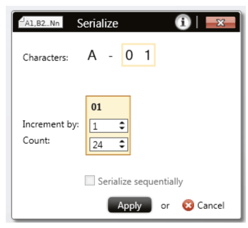 Once this box is available, you will want to:
- Select the characters 0 and 1 so when we get to jack 10 the identifier reads A-10 not A-010
- Select the increments 1
- Count is for the total patch panel jack count.
Select Apply and the patch panel is populated. The time from opening the software to printing patch panel labels is less than 2 min.
Patch panel tips
1. If the patch panel is color-screened, you can use a Black on Clear tape. This looks like the identifiers are printed on the patch panel.
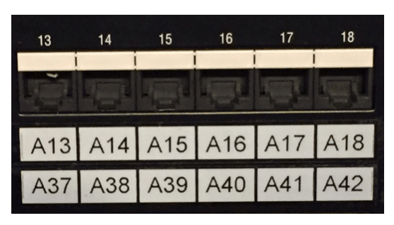 2. If the patch panel manufacturer provides colored paper labels for label holders, use Black on Clear tape to maintain the color.
3. Once you make a patch panel label, save it as a template for future use.
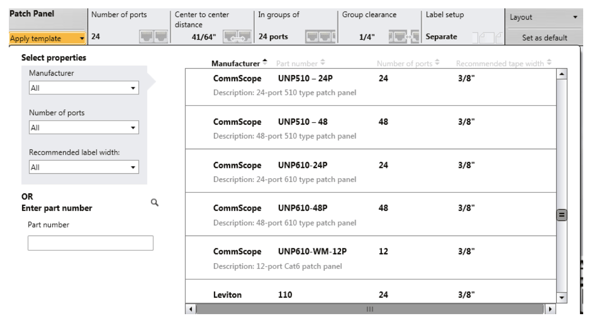
4. The XTL software and printers have many manufacturers’ patch panel templates built-in, so you just select the SKU number and apply. All the set-up for that patch panel is done for you.
The DYMO ID Software also allows importing label identifiers from an Excel spread sheet to save even more time. We are all aware that time saved is money saved.
If the patch panel is providing POE (Power over Ethernet), the POE symbol is built into the software and printers and can be applied to the specific jacks selected.
 (TIA POE Symbol)
We at DYMO are committed to providing the installer with complete labeling solutions that are (SPA): Simple to use…Professional…and Affordable.
While I used the DYMO ID software to demonstrate patch panel labeling, you can use the XTL 300 or XTL 500 printers and achieve the same results. Remember, if you have a 2u 48-port patch panel or a 1u 48-port patch panel DYMO, has a label solution for you.
Al Feaster RCDD
DYMO Industrial


.webp?width=58&height=58&name=youtube-app-white-icon%20(1).webp)